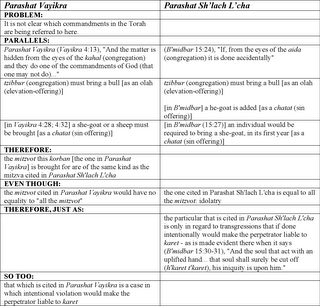
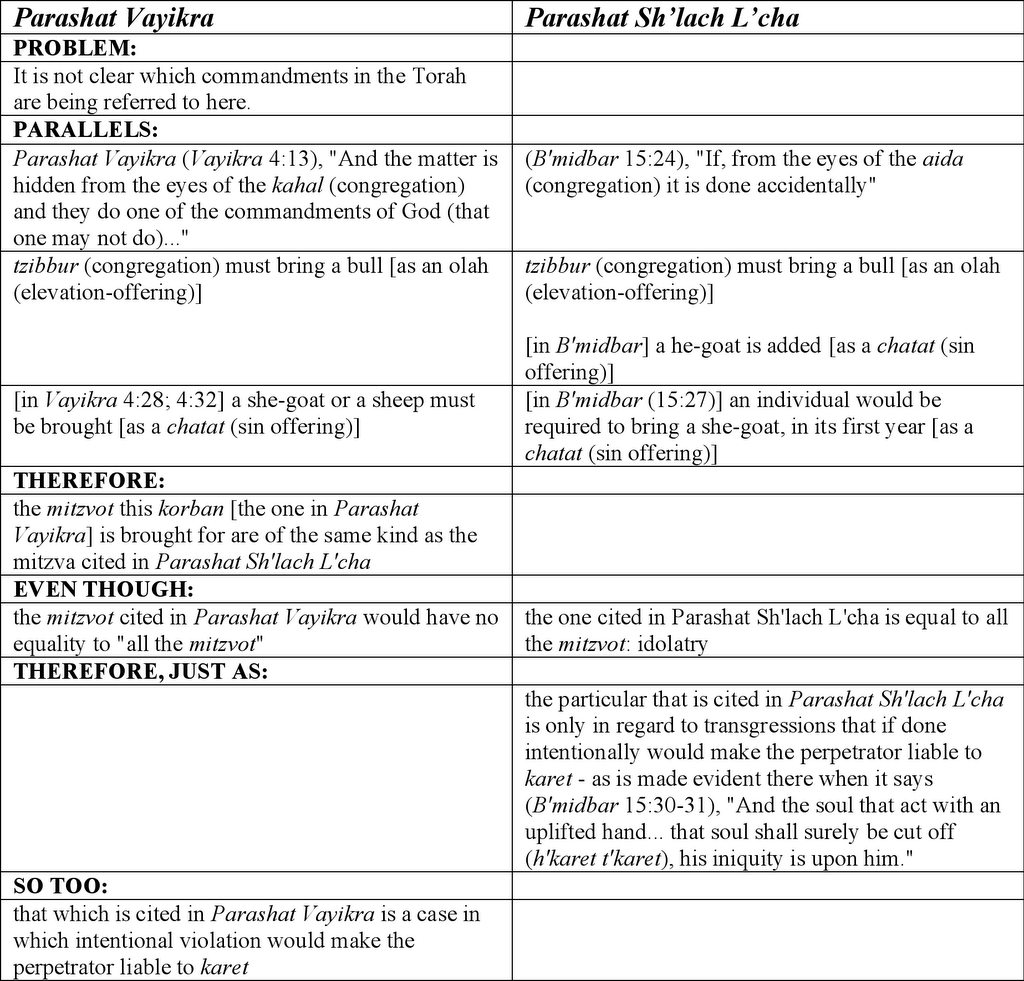
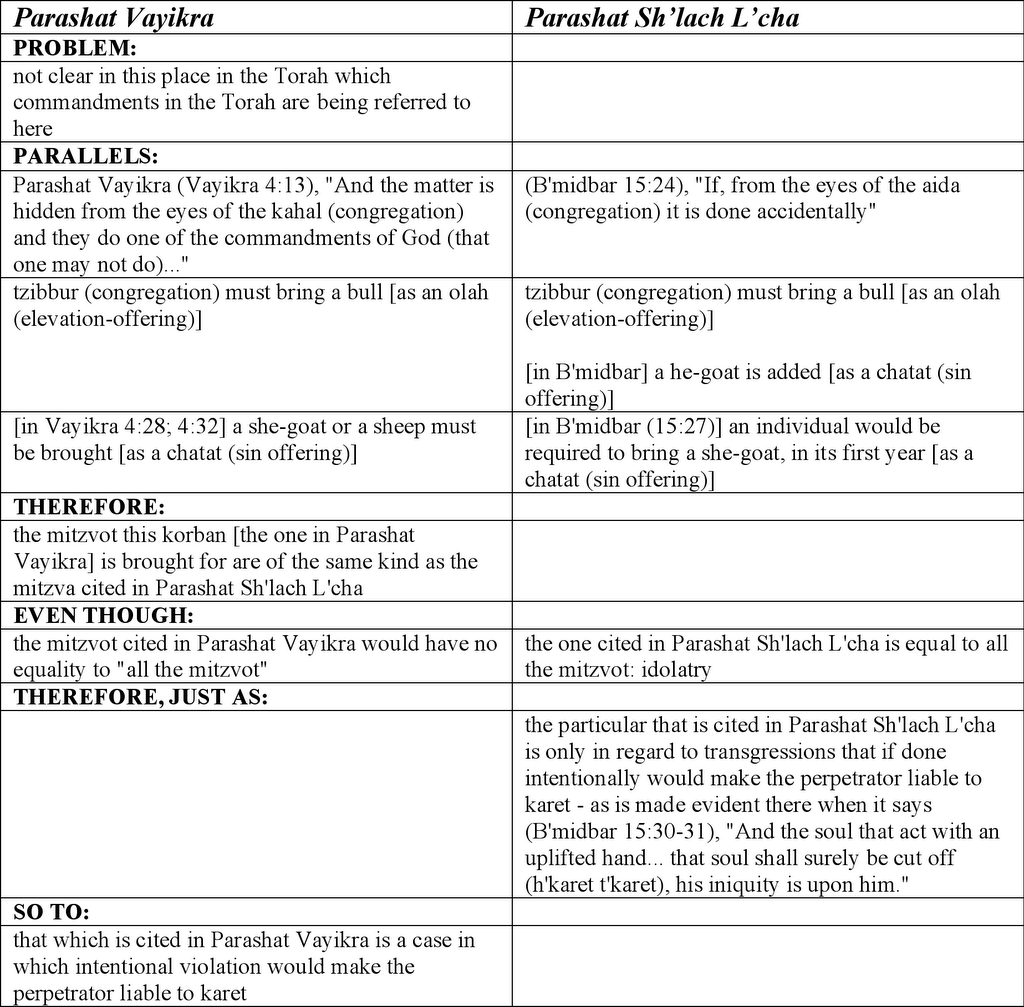
Chart for Second Makom May 25, 2006 Get link Facebook X Pinterest Email Other Apps I hope the following chart will make the second Makom clearer. Comments
Comments